Page 2 of 2
Re: My First Walking Beam Stirling engine build with pictures
Posted: Tue Sep 15, 2015 6:36 pm
by Ian S C
Gold medals for the twin engine, and the Watts Beam engine.
Ian S C
Re: My First Walking Beam Stirling engine build with pictures
Posted: Thu Sep 17, 2015 4:32 pm
by manvstaco
***New photos added to original post***
@triangle.Stirling My furnace is already starting to crack here and there :( I have seen your electric furnace on some of your you-tube videos, I'm jealous :D How much did you end up buying it for? Thank you for the flywheel compliments! I did work really hard on it, it was my first casing in my entire life :) I made the Styrofoam mold bigger than I needed it to be with the intention of spinning it down to a nice and even finish.
@Ian S C Thank you for the bearing tip! as of now they are holding very nicely, I made it a point to not cut the holes too big so they almost require a press to install. I got lucky and my next door neighbor had a bunch of brass tubing(not rolled!) he inherited from his dad years ago! It fits inside my copper piston wall perfectly! They will make great piston sleeves I feel. The inside diameter of my Copper tubing is around 26mm and the inside of the brass tubing is 22.5 mm without any boring/honing. I'm thinking I might be able to get away with the same stroke on the power piston with the smaller diameter but we'll see!! I know I could always reduce the stroke of the displacer cylinder to compensate for this but feel that would be a loss in efficiency.
Enjoying the input and ideas from you guys thank you :)
Re: My First Walking Beam Stirling engine build with pictures
Posted: Thu Sep 17, 2015 4:43 pm
by Triangle.Stirling
Lol, my furnace is not 'starting to crack, its literally falling apart. Haven't made a video with my electric furnace yet, that will come later but am very busy with school ATM. I bought it for 50 dollars though, in really good shape. They had to get rid of it fast because they were moving and didn't want to take it with them.
About your mould: was that normal 'packing' Styrofoam, and did you cut it with a knife or a hot wire cutter?
I'll take a look at the photos and check for updates:) I would keep the displacement ratio about 1:1.5 , that should be the best. So 1.5 for displacer displacement and 1 for power piston. But a very long stroke isnt very good I think as you mentioned.
What is your power piston made of? Looks like graphite, or is it JB weld mixed with graphite?
Good luck with Building!
Verstuurd vanaf mijn XT1068 met Tapatalk
Re: My First Walking Beam Stirling engine build with pictures
Posted: Thu Sep 17, 2015 5:00 pm
by manvstaco
Triangle, it was the Styrofoam from the dollar store that comes in sheets 1/4inch thick with paper glued to each side. I just peeled the paper off and cut them out with a box knife, stuck them together with spray adhesive and cleaned it up a bit on a sanding wheel.
power piston is 2 part epoxy mixed with an excessive amount of graphite powder and spun on my lathe
Score on the furnace price :D
Re: My First Walking Beam Stirling engine build with pictures
Posted: Sun Nov 15, 2015 7:53 pm
by manvstaco
To be continued this winter :)
Will post more once I complete the second cylinder.
Re: My First Walking Beam Stirling engine build with pictures
Posted: Wed Dec 30, 2015 4:11 pm
by Triangle.Stirling
as it's already winter, any news on the engine?
Re: My First Walking Beam Stirling engine build with pictures
Posted: Mon Apr 25, 2016 9:09 pm
by manvstaco
Hello all! Hello Triangle! Sorry it's been soo long, I haven't played with this engine since my last post, I bought a YJ jeep wrangler and those projects took most of my winter to complete.
Here is my most recent work on the Stirling.
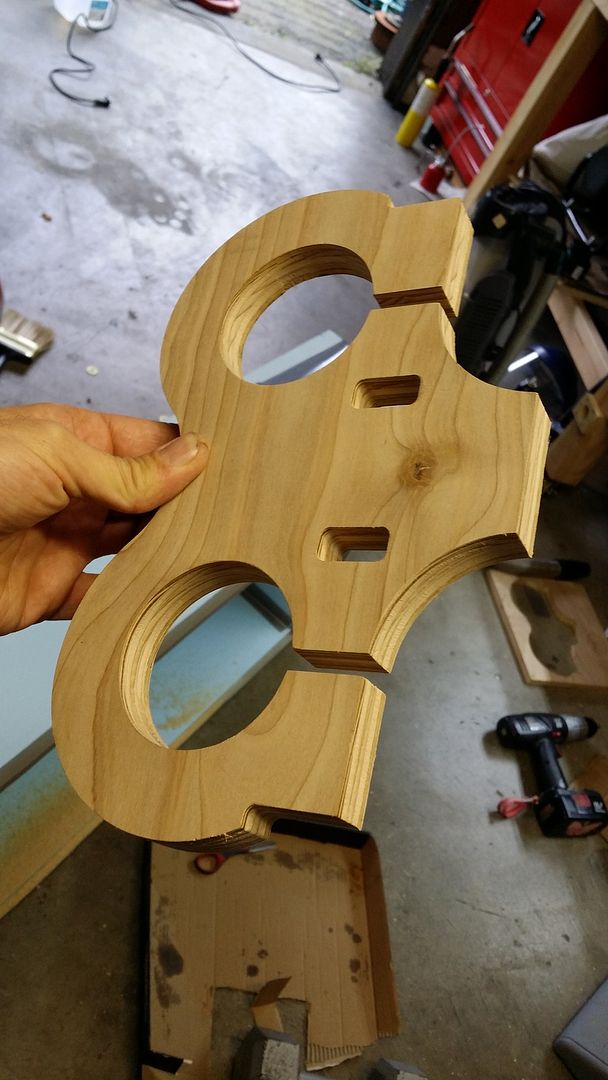
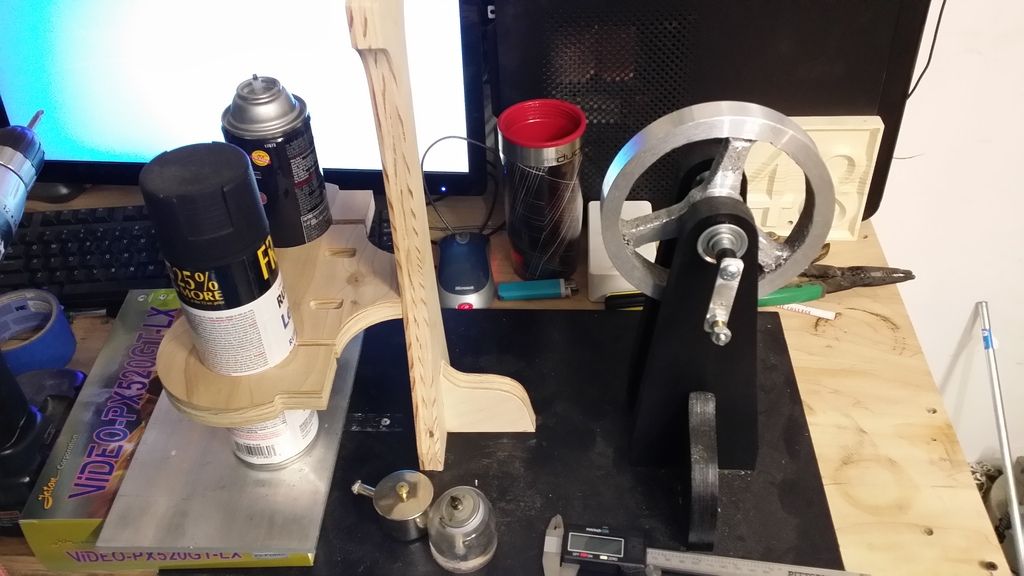
Designed this and made it on my newest CNC machine. It will be a way to hold the two pressure cylinders, the little rectangular holes will be for a washers and nuts, as holes will be drilled through it to tighten around the cans with a long bolts
Here is a mock up! I can't wait to get the two cylinders working together. I will be taking my time tweaking this design, I would like to get this working really well.
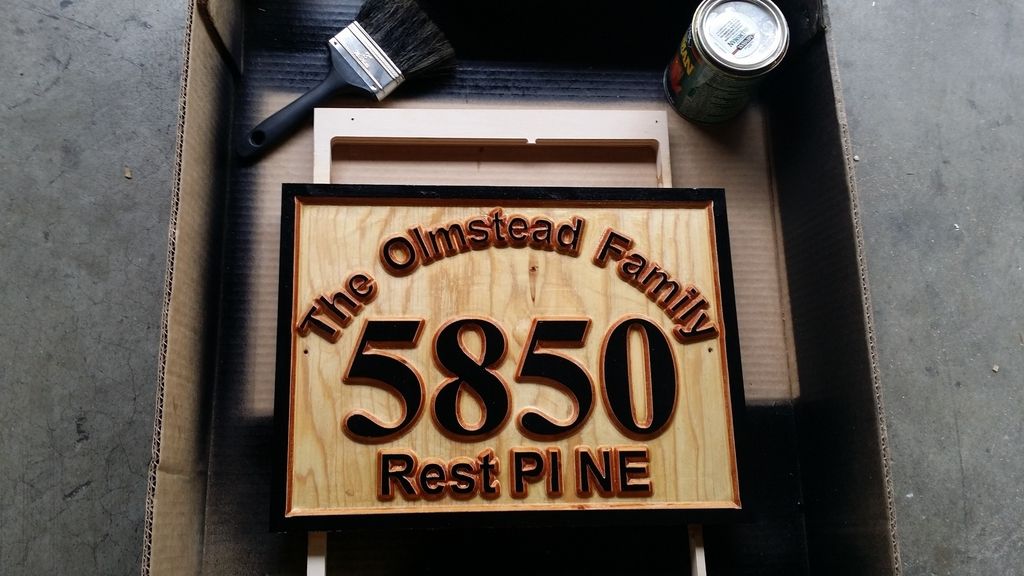
Here is a sign I made the other day, I think once I get my design down I'll try to make it look a little more pleasing to the eye by carving a bit of designs into it and putting on a nice finish like this sign I made for a friend. I would like to start trying to sell them at the farmers market and etsy. I think with my CNC machines I can duplicate them and make about one a day, not really sure what to charge for them quite yet, but we shall see :)
Re: My First Walking Beam Stirling engine build with pictures
Posted: Tue Apr 26, 2016 7:47 am
by Wellington
Looks good. One easy and cheap way to cast small parts is to use the delft clay casting system:
https://www.youtube.com/watch?v=gz6zZjieuhc
Wellington
Re: My First Walking Beam Stirling engine build with pictures
Posted: Tue Apr 26, 2016 9:50 pm
by manvstaco
Oooo I like this! I'll have to try it!


